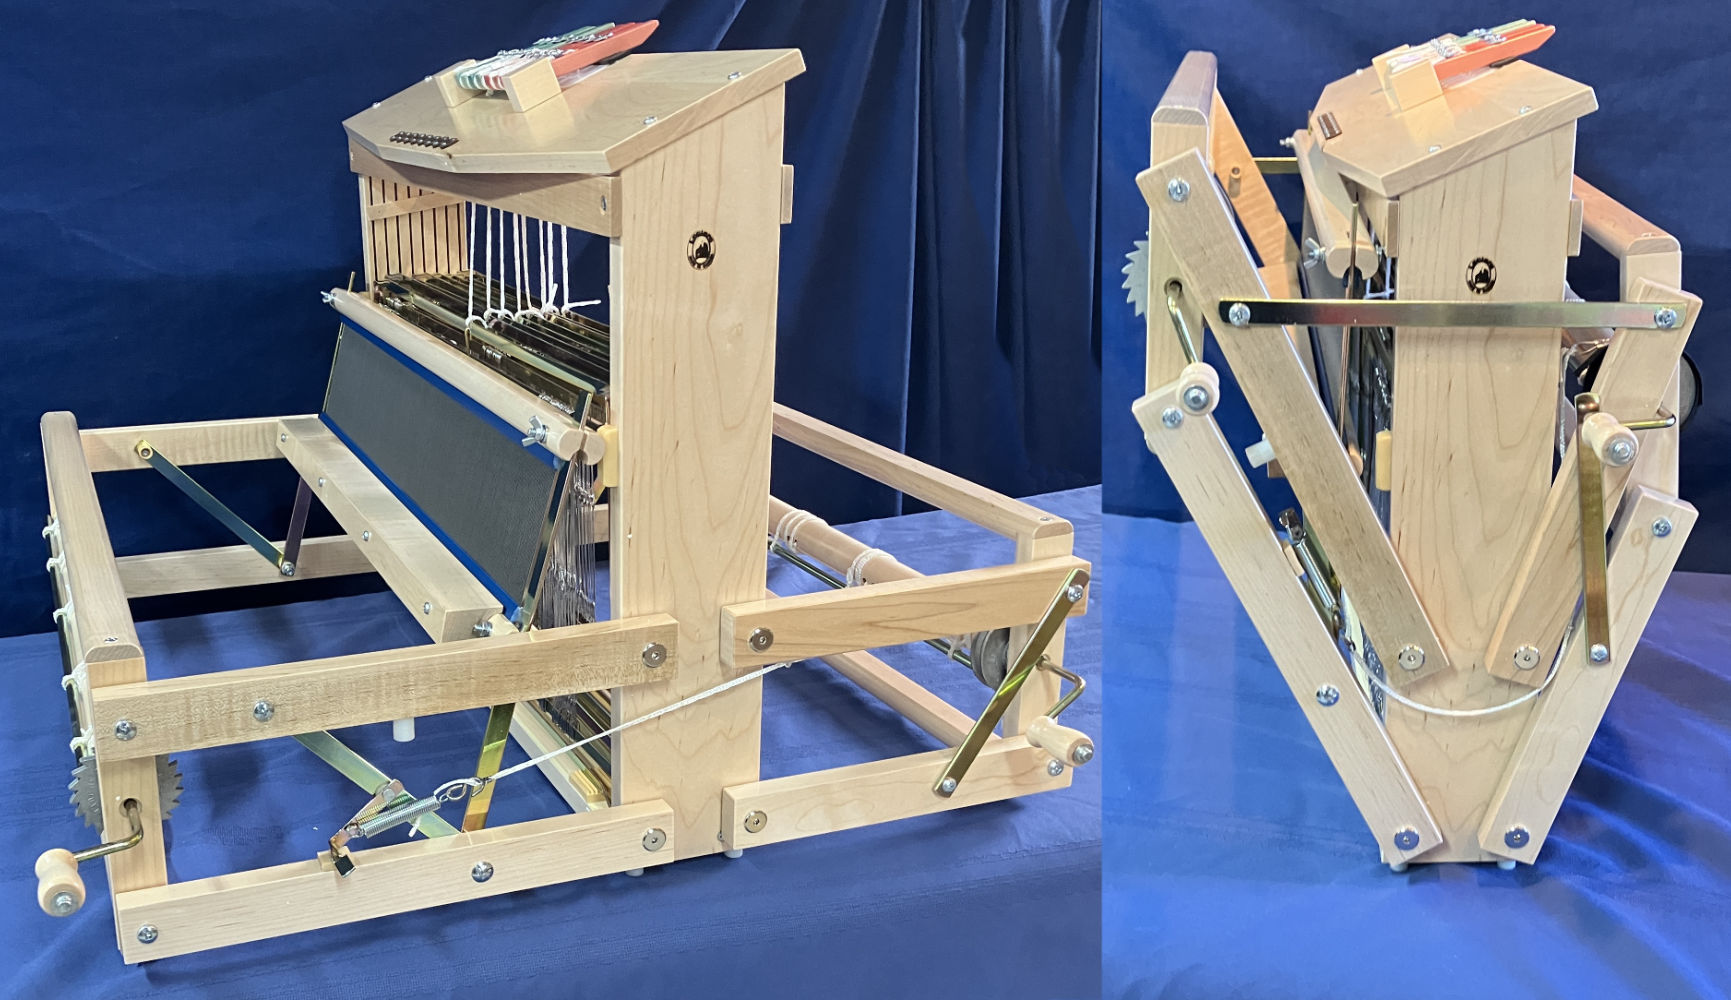
Both the front and back of Leclerc Voyageur weaving looms can be folded in to reduce the physical depth of the loom for storage or transport. The loom can be fully folded even while warped in the middle of a project.
The loom shown in this guide is the 8 shaft version but the 4, 12 and 16 shaft version can be folded up in much the same way. Note that the smaller 15 3/4 and 9 1/2 inch versions have a different frame design so the folding process is not exactly the same and the 24 inch model described here.
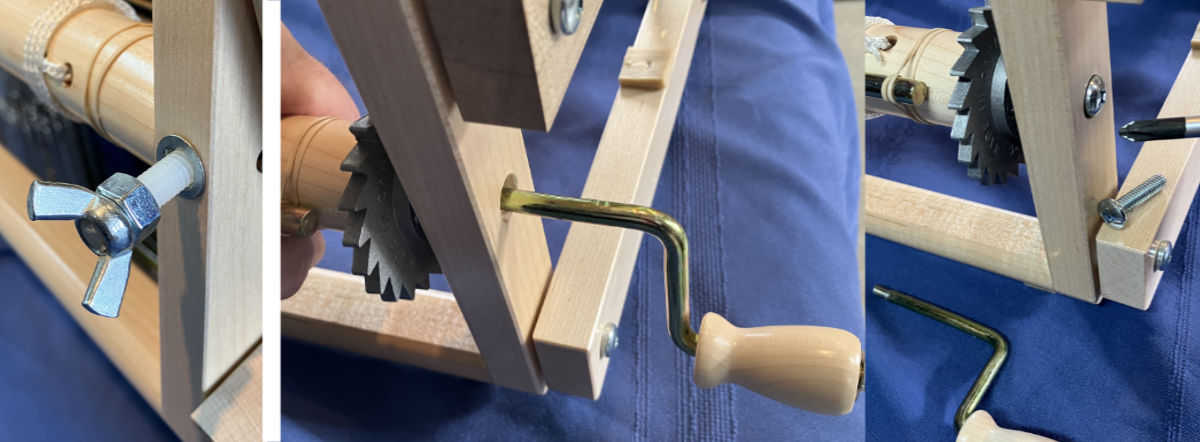
Depending upon how the loom is to be stored, the first step is to remove parts that extrude from the loom body and may become damaged if the loom is being packed or transported. These include the Warp Beam Advance Control nylon screw at the back left of the loom (if it is being used) by simply unscrewing it by turning it counter-clockwise.
Because the Cloth and Warp Beam Crank Handles also stick out, they can be removed. Just grasp the wooden beam with one hand and rotate the crank handle counter-clockwise to unscrew the handle. Then, to keep the beam secure on the right side, install the screw that came with the loom where the crank handle was. Note that if the loom is just being folded for temporary storage and will be protected from physical damage, the crank handles can be left installed.
Adjust the levers on the top of the loom so all shafts are lowered.
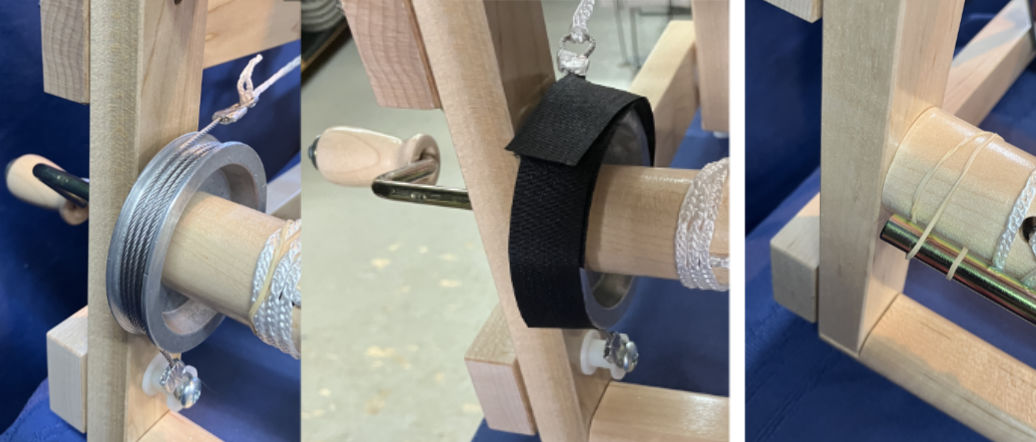
Folding the loom will remove the tension on the Texsolv cord that pulls on the Brake Cable keeping it tight around the Brake Drum. This can cause it to uncoil a bit. Instructions on how to reposition it can be found in the Assembly Manual but we prefer to wrap it with an elastic or the black velcro straps that came with the loom to keep it in place. Once the brake drum is wrapped, raise the brake lever at the front to take tension off the brake cable.
If there is no warp on the loom, and a pawl releases during the folding process, the warp rod and cords can unwind, so we loop an elastic around the beams at each end to keep them secure. If the loom is warped, advance the warp so the fell line is close to the front thread beam. If the warp needs to be released more to allow it to lengthen as it goes through the loom, it is easier to adjust it by turning the cloth beam while folding the loom.
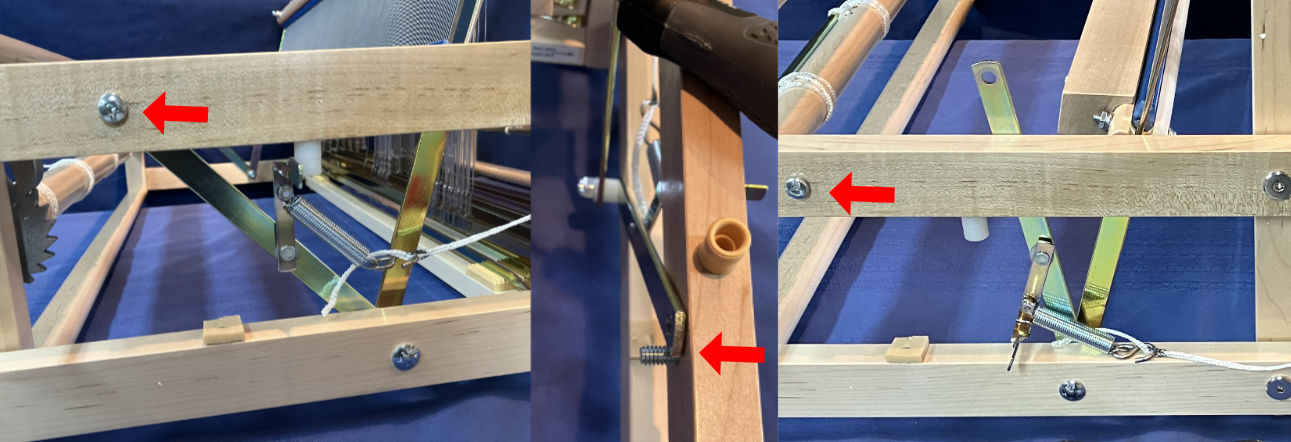
By loosening the top frame screw at the back on each side with a screwdriver, the Rear Stabilizing Brace can be disconnected by simply rotating it out of the way. It is not neccessary to fully remove the bolt as the brace is notched. Do not re-tighten these screws as they are used later in the process to lock the loom in the folded position.
Unscrew and remove the brown nylon nut on the inside front right and left sides of the loom (on the upper frame piece as shown by the red arrows). Then push the bolt out so the top of the front brace can be disconnected and swung out of the way (unlike the rear brace, it has a hole instead of a notch). Reinstall the nylon nuts but leave them loose as this bolt will be used to hold the loom when folded. Before doing this on the right side, note the position of the brake lever on the front side of the brace as when it is unfolded it will have to be positioned back this way before reattaching the brace.
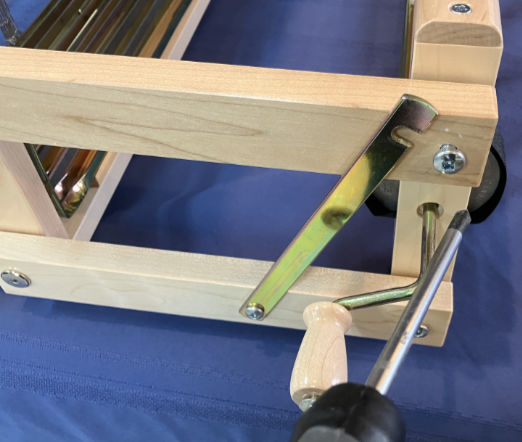
Locate the two metal "hook" bars with a notch at each end. These are used to lock the loom in the folded position. Then with the Rear Brace disconnected, the rear section can be folded up. Make sure the metal braces are positioned so they don't stick out. Note that generally the lighter back section will stay in the raised position without being held as long as the frame bolts are not too loose. If is easier, the front can be folded up first and then the back section.
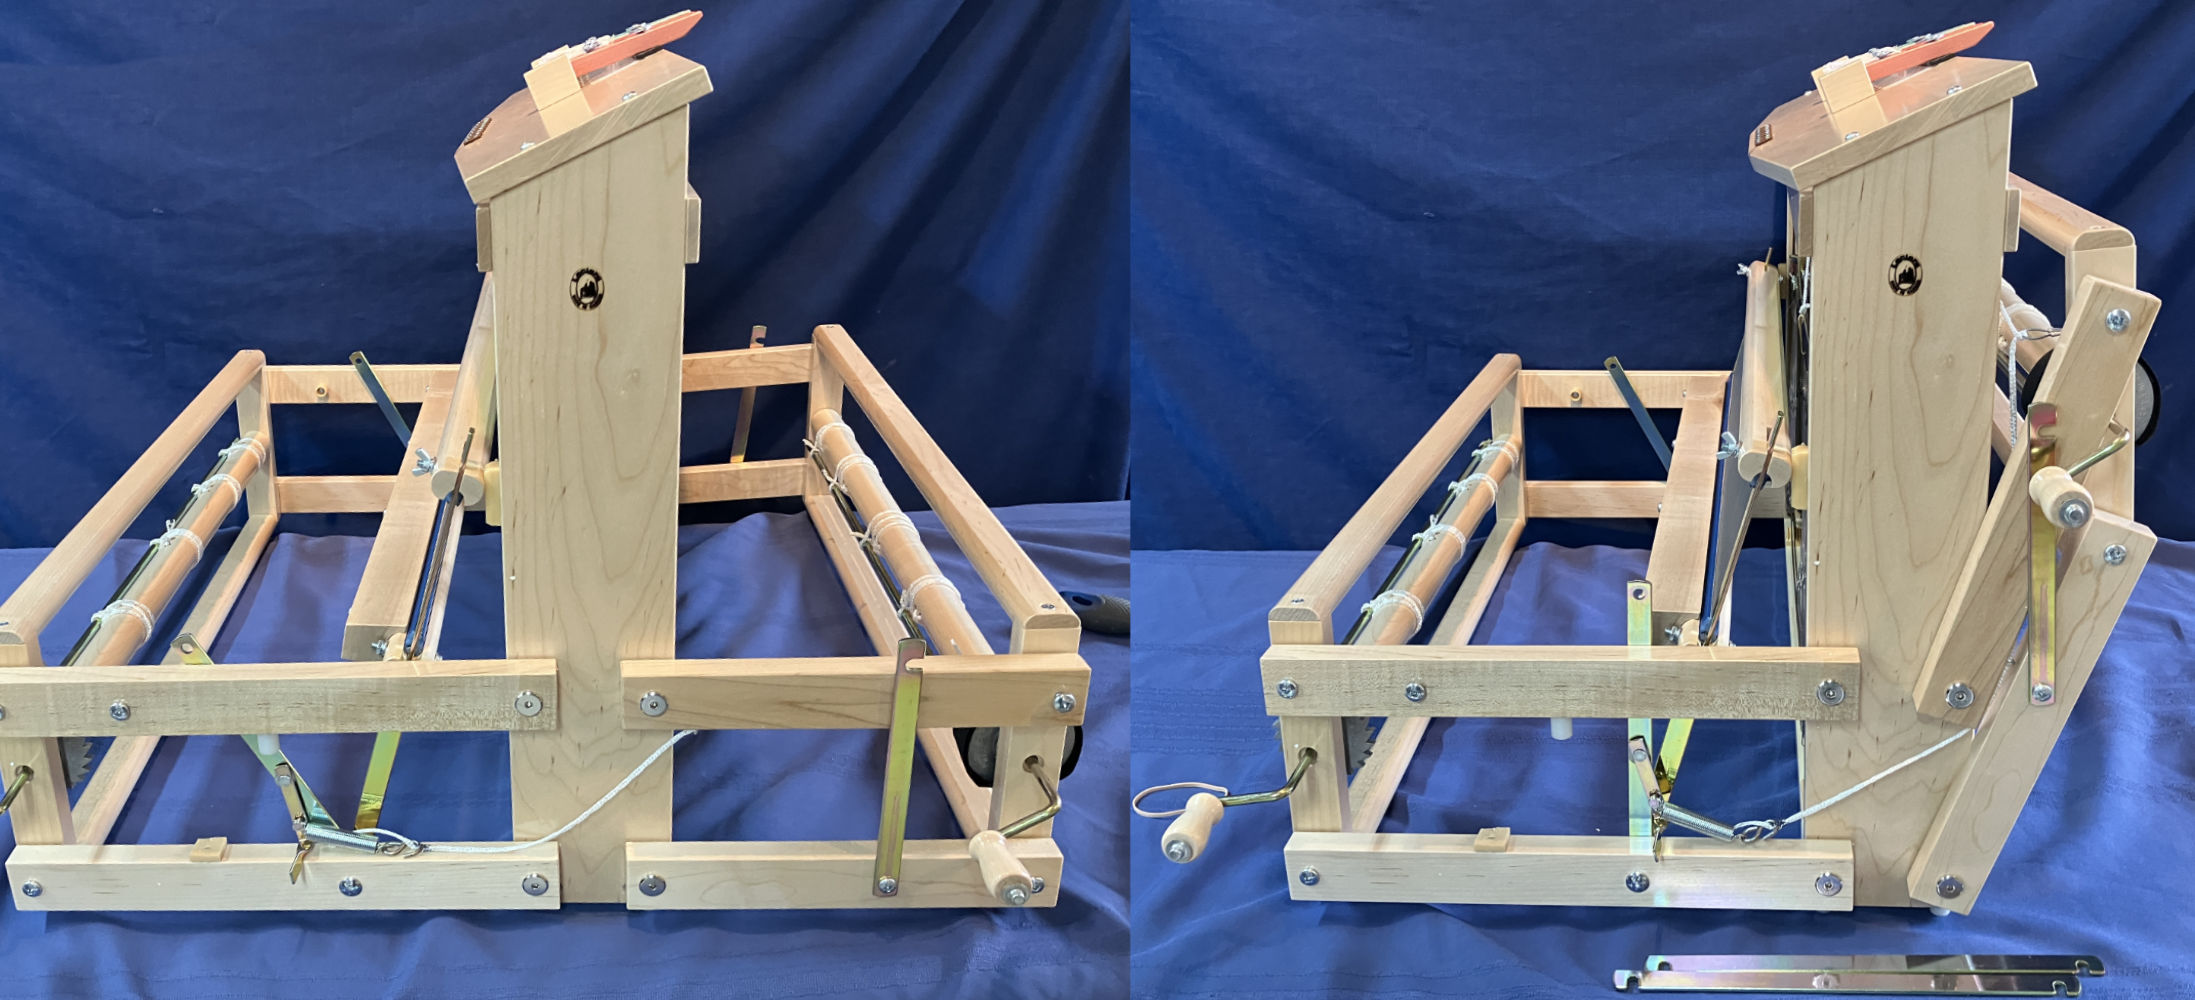
The front frame can also be folded up toward the castle of the loom. As it is folded, watch the position of the beater keeping it positioned between the front thread beam and castle as it can catch either one preventing the front section from folding fully. If it doesn't fold up completely check the beater and the front brace position to make sure they are not stopping it. Also watch the front braces and the brake lever and spring on the right side to make sure they don't interfere.
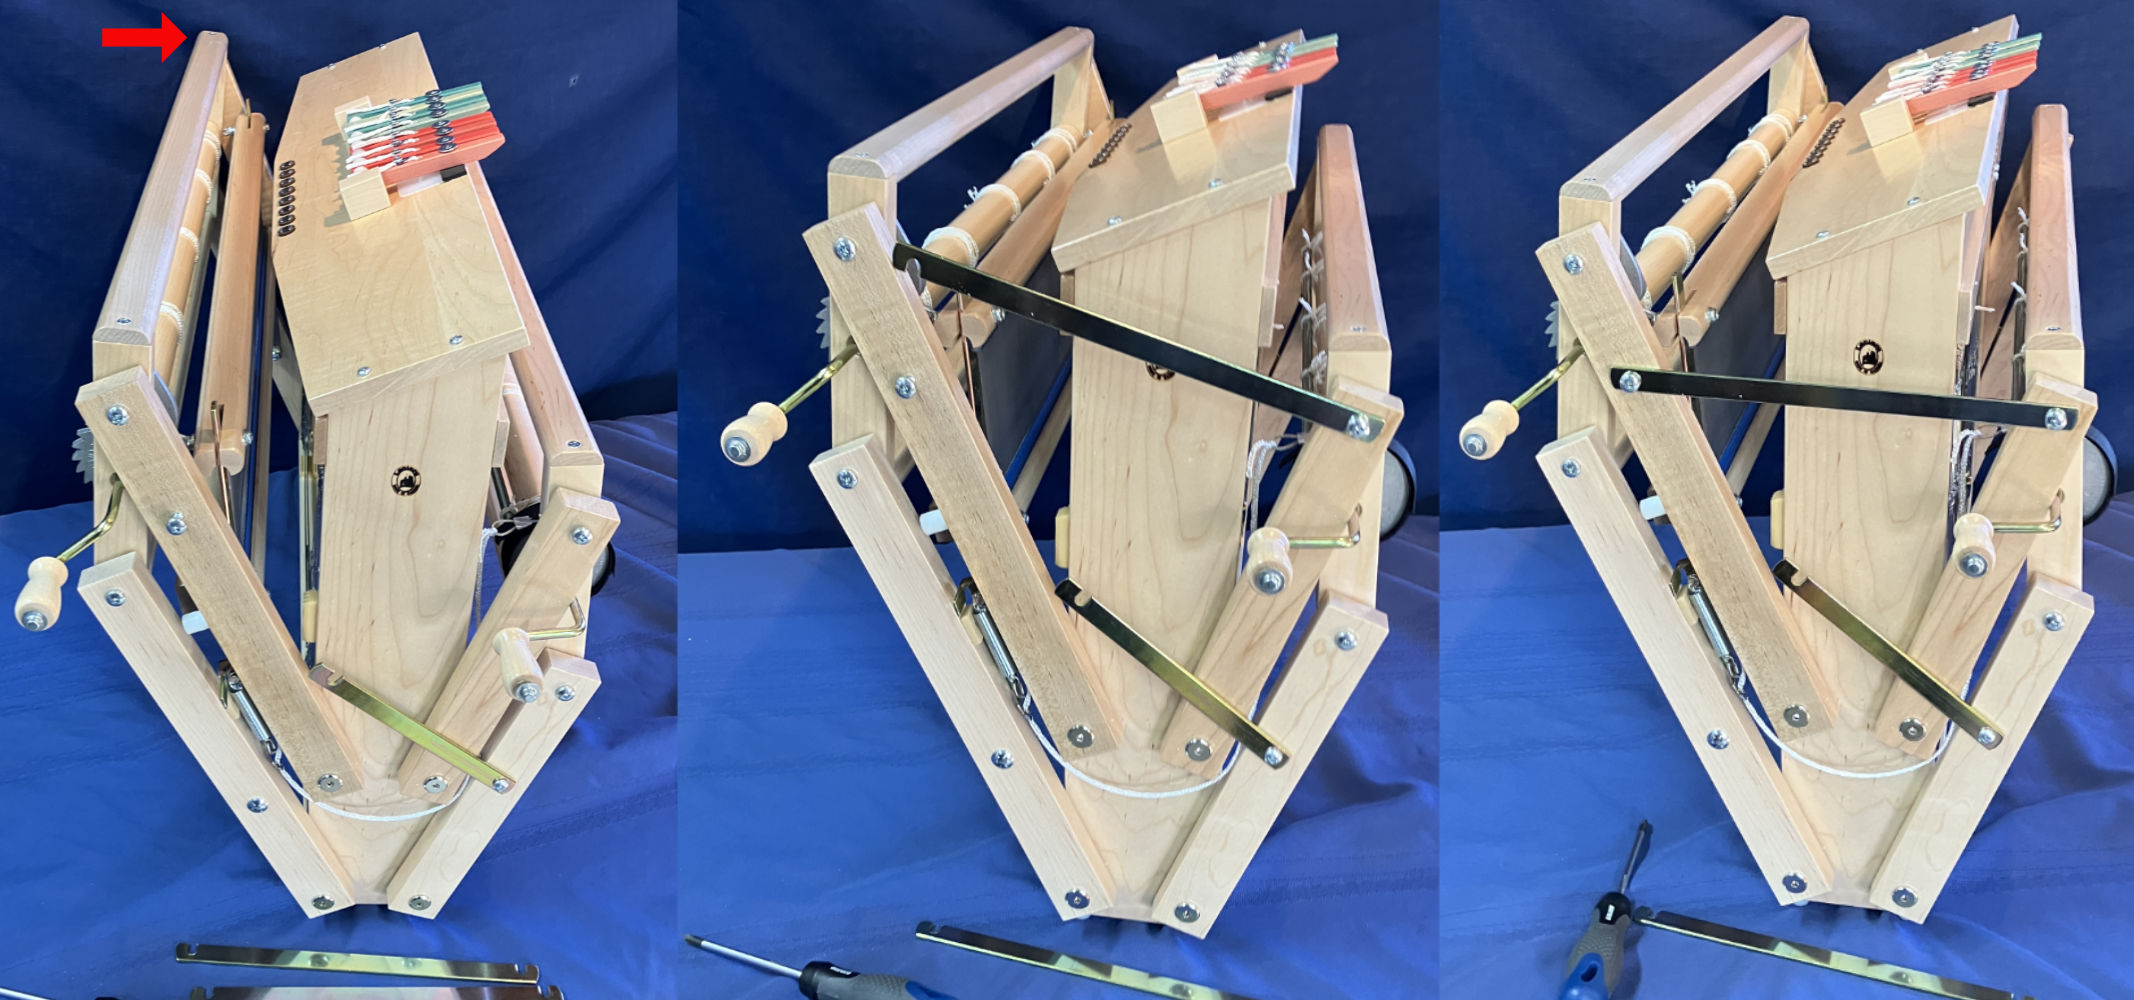
Because the front frame with the beater is heavier, it normally needs to be held up to stop it from dropping. If the loom is positioned beside a wall or solid object slightly diagonal with one of the front corners touching the wall when raised (where the red arrow points), it is easier to install the hooks without having to hold the front up.
When both the front and back sections are fully folded up, install the metal "hooks" over the front and back bolts that were loosened when disconnecting the braces. Then tighten the back bolt with a screwdriver and hand tighten the brown nylon nut on the inside at the front. Be carefull not to overtighten the nylon nut as the threads inside can be easily stripped if a screwdriver is used with too much force.
The loom is now folded for storage. It can be unfolded to weave by following this process in the reverse order.
When unfolding the loom be careful to position the braces so they are at the correct angle to allow them to go over the bolts. Before attaching the front right brace, make sure the lever and spring are positioned with the lever pointing toward the front as shown in the top picture. When the velcro is removed from the brake drum, check the brake cable to make sure no turns are overlapping.
If the bolts do not appear to line up with the holes or notches on the braces, lifting or lowering the front or back section in relation to the castle position will allow them to be aligned. This can be made easier by hanging the front or back section over the edge of a table while lining the bolt and hole/notch up.
Note that the loom when folded can easily fall over toward the front so, if it is to be left in the folded configuration, always position it so the front is leaning against a wall.
 |
NEED HELP? Contact us for help in answering questions about these products or for help recommending a loom matched to your weaving level and needs. See our Leclerc Loom Comparison Chart for more help in deciding which loom is right for you. |
|
How to Order: Orders may be placed using our secure Online Order Form (this form should open in another window). Click Here for more information on how to place an order as well as our terms and conditions. Payment/Currency: Payment can be made using VISA or Mastercard, Cheque or Money Order in US or Canadian funds. US credit card purchases are billed directly in US funds eliminating any foreign currency conversion charges by the credit card company. Product Directories If you are looking for other items on our website, try using our product directories to quickly find what you are looking for! Our products are grouped as follows: Weaving/Spinning Product Index Books, Magazines & Videos. |
Price/Shipping Quote? If you would like an exact quote for any items complete with shipping costs, please call or email us at nmanners@camillavalleyfarm.com with you location and we will provide this. Gift Certificate If you are looking for a gift for a Knitter or Weaver and can't figure out what they want, a Camilla Valley Farm Gift Certificate is an excellent way to ensure you get the perfect gift! We can also email gift certificates if you are running out of time! Latest News/Updates Keep up to date with what is new at Camilla Valley Farm by following us on Instagram! (Click on the logo below)  |