Weaving Tools Checklist

In addition to the weaving loom, there are a number of tools and accessories that are normally needed to weave on a loom with shafts. New Leclerc floor and table looms come with a number of the basic items required but additional tools will probably be required. Pre-owned looms may also come with some of these tools or they all may have to be acquired.

This checklist identifies the basic tools that are required by presenting a simplified description of the various stages of the warping and weaving process and matching them to the tools normally needed at each point. There are additional tools that some weavers use and can be helpful in specific types of weaving so this list is not comprehensive but just provides a basic checklist for the new weaver starting their first project.

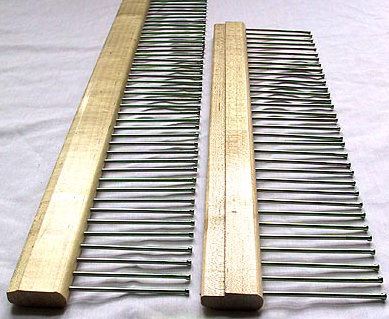
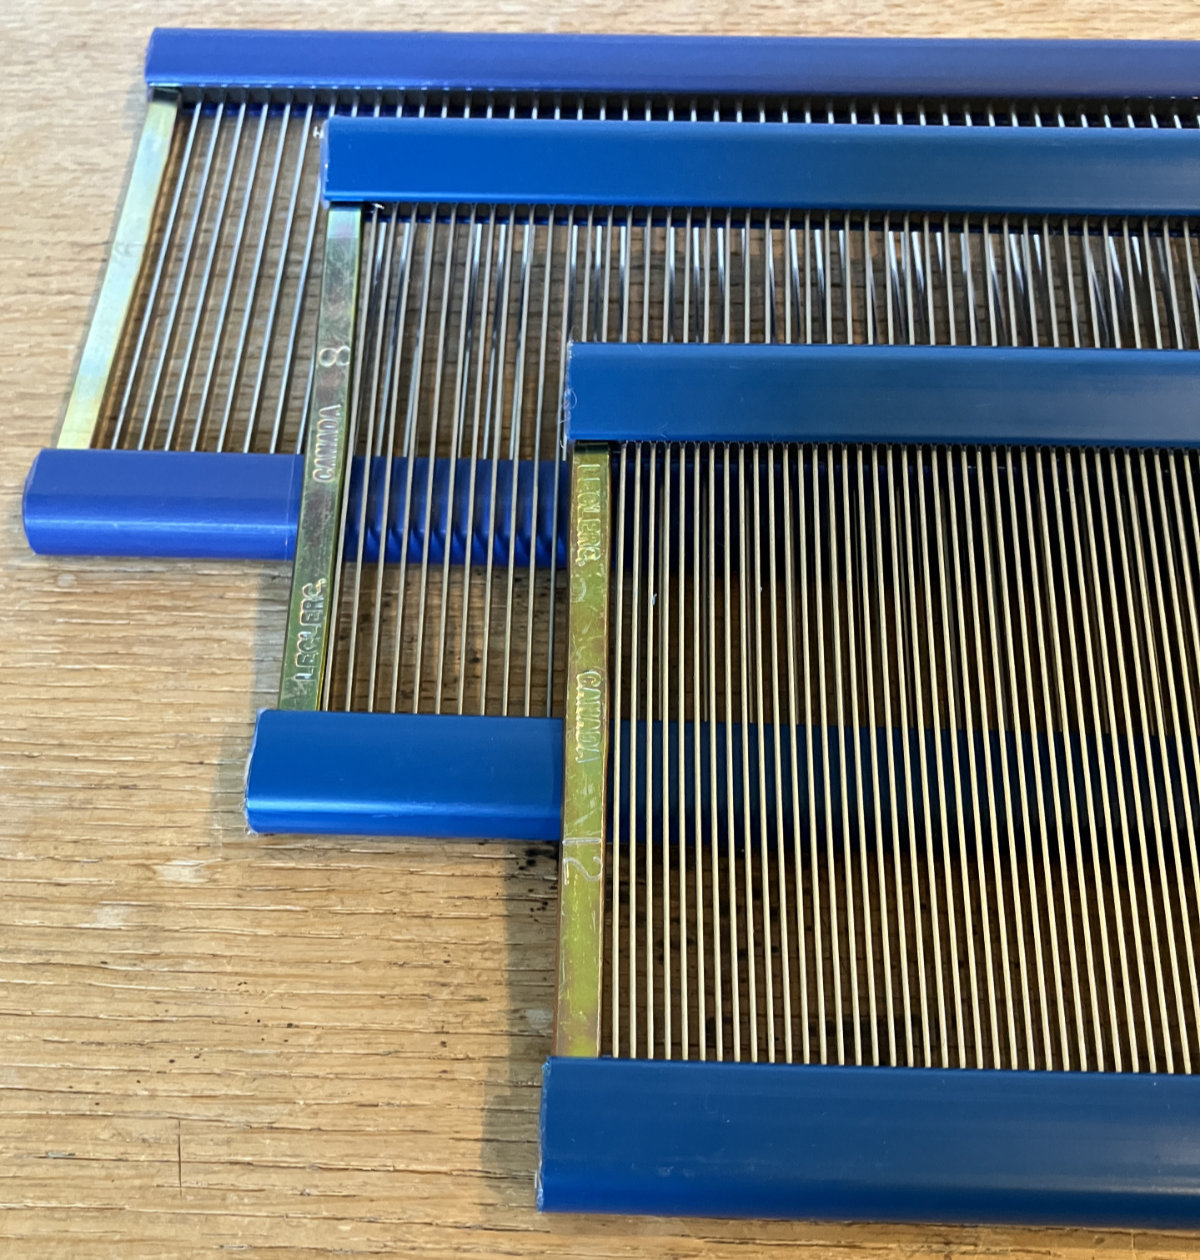
Step 1 - Getting the Loom Ready

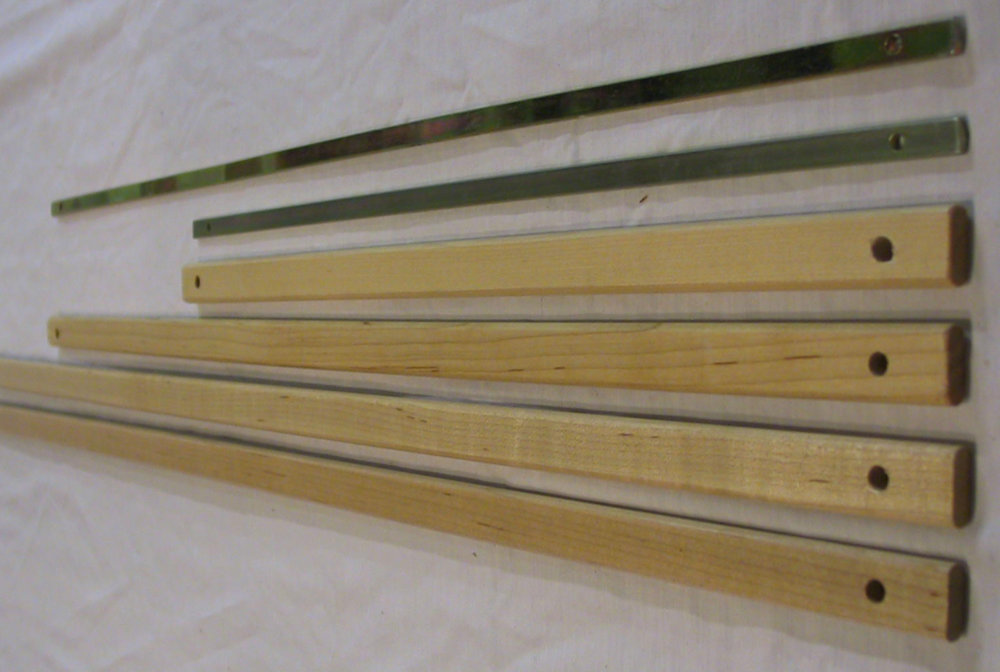
Before beginning the weaving process it is important to determine if the loom is configured to weave the chosen first project. This is in addition to making sure the loom is functional with working parts and the cloth and warp beam set up to tie the warp on.

The project chosen will dictate what Reed is to be used as it will maintain the separation of the warp threads to what the pattern calls for ie the Sett or "ends per inch". A single Reed can sometimes be used for multiple Setts by using an uneven pattern when threading and/or putting multiple threads through the dents (ie the gaps in the reed). When using a thicker warp in a project with a lower sett, a Reed with fewer dents should be used to avoid abrading the warp threads.

Typically a weaver will have a small collection of reeds to allow them some flexibility or will have built up a collection over time. A typical combination is for a weaver to have an 8, 10 and 12 dent reed but this really can vary depending on the weaver's area of interest.

The project will also determine the number of Heddles required on each shaft of the loom and weavers normally configure the loom with more than required to avoid having to move the Heddles between shafts to get the exact amount the pattern calls for. After threading the loom, any leftover heddles are pushed to each side out of the way. If you are using the full width of the loom and know you will have extra heddles on a shaft frame, instead of removing them, they can be interspersed among the "live" heddles as you thread.

On new 4 shaft looms Leclerc normally provides the following quantities:

  • 9-15 inch = 400 heddles
  • 24 inch = 600 heddles
  • 27-36 inch = 1,000 heddles
  • 45 inch = 1,200 heddles
  • 60 inch = 1,500 heddles

More or fewer Heddles may be required depending on factors like the width of fabric being woven and the ends per inch being used. Heddles are available in Wire, Inserted Eye and Texsolv. The decision of which to use is the weaver's preference as all three will work on Leclerc looms. You can even mix heddle types on a shaft frame if you choose.
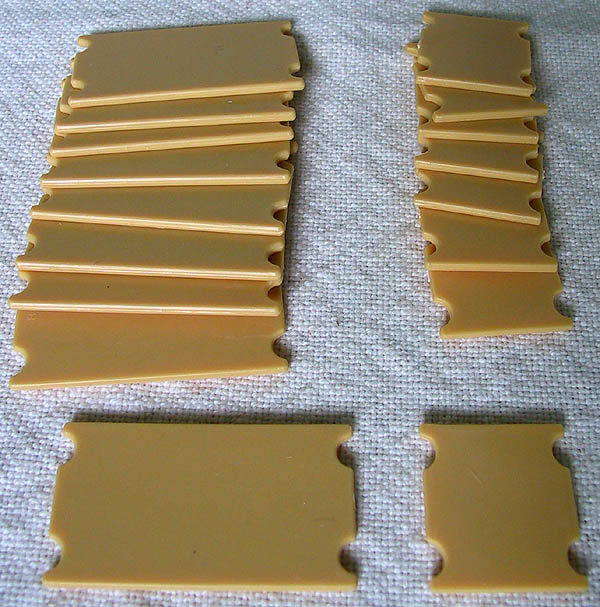
Reeds


Heddles


Step 2 - Creating a Warp

There are three main ways to create the "warp" which is the collection of warp threads that are installed on the loom in the "warping" process. These methods are all designed to allow the weaver to get a large amount of yarn off the cones or spools they come on, in the proper order in terms of colour and type, and with all threads remaining parallel and having the same length.

This is critical to ensure that all the warp threads across the width of the fabric have an even tension and to avoid any tangling of the yarn which can cause problems during the warping process.

Method 1 - Warping Board

The most common method of constructing a warp is using a Warping Board which has a set of pegs that the weaver wraps the yarn around in a consistent order to get a specific length. The weaver counts the threads as they repeatedly wind the yarn around the pegs in a fixed path and different colours can be alternated depending on the pattern.

The length of the warp will determine the number of pegs that are used and the number of warp threads will determine how wide the fabric will be. A Guide String is normally placed on the warping board before the warp is wound to indicate the path to follow.

Warping Board

Method 2 - Warping Mill

A Warping Mill is like a 3 Dimensional version of the Warping Board. Rather than winding the warp threads around the pegs of the Warping Board, the warp length is set by winding it around the circumference of the Warping Mill. Different warp lengths can be wound by adjusting the number of turns of the mill while using the pegs on the ends to make the "Cross".

Some weavers find the Warping Mill is easier on their arms and shoulders because there is less arm movement involved. Rotating the Mill is easier than the long reach required when using the Warping Board.

When a warp is constructed using a Warping Board or Mill, the complete warp is created and then transferred to the loom winding it on using either the Front-to-Back or Back-to-Front method explained below.

Warping Mill

Method 3 - Sectional Warping

This third method of creating a warp is a hybrid process that combines making the warp with the next stage in the process which is "warping" or loading the warp onto the loom. This is a more complex process, is better for very long warps, requires a number of other accessories and is not recommended for beginners unless they have an experienced weaver helping them learn.

When a warp is constructed using a Warping Board or Mill, the complete warp is created and then transferred to the loom winding it on the warp beam at the back, carefully spacing it out across the length of the beam. "Sectional Warping" allows the weaver to construct the warp in 1 or 2 inch wide sections, winding each directly onto the warp beam, before moving to the next section and winding it on.

While this sounds like a simpler process, there are a number of differences that actually make it more complex. The first is that instead of winding a warp off a single tube or cone of yarn, the weaver will require a separate tube for each of the warp threads in that 1 or 2 inch section. For example, if the pattern calls for 18 ends per inch (EPI) then 18 tubes or cones of yarn will be required to wind on that 1 inch section.

While it may make sense to buy that many tubes or cones of yarn in some situations, it is often more practical for the weaver to distribute the yarn that is required onto the number of "Spools" that are required for each section. These reusable plastic Spools are handy but normally require a Spool Winder to wind the yarn from the cone or tube it comes on. In addition an optional Yarn Counter helps to measure out the correct length of yarn on each Spool to avoid waste.

To feed the yarn from these multiple tubes or Spools without getting them tangled, a Spool Rack is normally used to keep everything organized and to direct the threads toward the back of the loom together and in order. It allows the yarn to unroll rather than being pulled off the end which may add more twist to the yarn.

To maintain a constant tension on the warp threads as they are wound on the loom Warp Beam and to position them so they don't overlap, a Tension Box attached to the back Thread Beam of the loom is used to feed the yarn onto the Warp Beam. There are a number of accessories that work with the Tension Box including a Counter, an Extension to get closer to the warp beam, Guides to keep the threads aligned and different Combs to space the threads similar to what the Reed does.

To keep the yarn organized on the Warp Beam, a set of Sectional Rakes are attached to the beam on 4 sides (or 8) to divide up the beam in 1 or 2 inch sections. These rakes replace the normal Apron and Warp Rods used for the other two warping methods described previously.

Note that the process described above results in the warp being created and these warp threads being wound on to the loom Warp Beam. The threads still have to be fed through the Reed and Heddles and tied on to the Cloth Beam which is covered in the next section.

Sectional Warp Beam


Tension Box


Spool Rack


Spools


Spool Winder


Step 3 - Warping the Loom

Once the warp is created it has to be "installed" on the loom. The goal of the warping process is to tie one end of each warp thread to the Warp Beam, wrap each warp thread around this beam and have the other end go up over the rear Thread Beam, travel horizontally toward the front of the loom with each thread going through the eye of one Heddle. The warp threads then continue on through one of the gaps or "dents" in the reed, then go over the front Breast Beam and down to the cloth beam at the front of the loom which they are tied onto. All this is done with the warp threads spaced across the width of the loom, parallel to each other, spaced so the overall width is what is desired for the fabric and all at the same length so that when the Cloth Beam is advanced they are all at the same tension.

There are two ways of feeding the yarn through the Reed and Heddles which is called "Sleying" the Reed and "Threading" the Heddles. If you start with the warp at the back of the loom and feed it through the Heddles and then the Reed it is called "Back-to-Front" and the weaver usually sits at the front of the loom pulling the threads first through the Heddles and then through the Reed.

If instead the weaver starts with the warp at the front of the loom, they normally sit at the back and feed the warp threads through the Reed and then the Heddles. This is called the "Front-to-Back" method. Each method has its advantages and each weaver will pick their own.

In the "Sectional Weaving" method described above, "Back-to-Front" is used as the loom has already been tied and wound on the warp beam at the back.

In order to take a warp that has been wound and use it to warp the loom, there is a procedure to follow and a number of tools that make the job easier and more importantly ensure that all the yarn does not end up in a tangled mess!

A pair of simple sticks the width of the loom called Lease Sticks are used to hold the end of the warp that has been made to ensure that the order of threads is preserved in what is called "the cross". The Lease Sticks are used during the warping process to maintain order. Some weavers remove them after the Reed is sleyed and others prefer to keep them installed during the weaving process.

A Raddle which is a board the width of the loom with physical dividers every half inch is often used to space the yarn out so it is positioned correctly across the width of the loom. Raddles are normally required when warping "Back-to-Front" to keep the threads organized before they go through the heddles.

A Reed and/or Heddle Hook is used to make it easier to get the individual warp threads through the reed and heddle eyes. The weaver inserts the hook through the reed dent or heddle eye, hooks on the correct thread and pulls the hook and thread back through. While a thread can be put through a Heddle Eye or Reed Dent by hand these tools speed up the process and reduce the chance of a threading mistake where threads are crossed or missed.

As the warp threads are wound around the Warp Beam it is a good idea, especially on long warps, that something is inserted between the turns to keep the warp leveled out so there are no high or low spots which will affect the tension. Some weavers use some kind of paper for this but Warp Sticks can be inserted parallel to the warp beam every so often, are reusable on every project and provide a more stable support for the threads.

For Sectional Warping, which combines Step 2 with part of Step 3, instead of Warp Sticks to separate the turns, special plastic Dividers designed to fit in the 1 or 2 inch space between the metal brackets are used as the warp is wound on the Sectional Warp Beam.

Lease Sticks


Raddle


Heddle/Reed Hook


Warp Sticks


Sectional Dividers


Step 4 - Weaving

Once the warp is on the loom and tensioned, weaving the fabric can finally begin!

In this part of the process, the weaver passes some kind of Shuttle loaded with weft thread/material through the "Shed" or vertical space between the warp threads created by the loom as shafts are raised and or lowered. There are a wide variety of Shuttle types including Rag Shuttles to hold fabric, Ski Shuttles and Stick Shuttles to hold bulkier yarn, but the most common are Boat Shuttles that hold a Bobbin (or bobbins) with weft thread wound on it.

While a single Shuttle may be enough, when weaving multiple colours of yarn on a project, having a Shuttle for each colour of yarn loaded on it, saves time, so it is common for weavers to use a number of shuttles on a project.

Before the Boat Shuttle is ready to be used, the weft yarn must be wound on it. Normally some kind of a Winder from a simple mechanical one to a faster electric powered design is used to speed up what many find a tedious process. Because winding a Bobbin interrupts the actual weaving, most weavers have a supply of bobbins so they can wind a batch of them and simply replace the empty Bobbin in the Shuttle with a new full one to keep weaving.

On some fabrics, even though the Reed is holding the yarn to match the desired Sett, there may be draw-in with the fabric narrowing as it gets closer to the front Breast Beam and the Cloth Beam. A Temple (also called a Stretcher) is often used by the weaver to keep the fabric pulled out while it is being woven. It may not be required for many projects but some weavers use them all the time. They are especially helpful when weaving rugs.

Shuttles


Bobbins


Bobbin Winder


Temple


More Information

There is quite a bit more to the process of constructing a warp and then weaving the fabric. Fortunately there are some very good books to help both the new weaver learn the process and also provide a reference to the more experienced weaver.

These are the books we recommend:

Learning to Weave - This is probably the best book for a new weaver as it breaks down the process into lessons with excellent descriptions and illustrations. This guide is used as the textbook for many beginning weaving courses and a well used copy is found in the library of many handweavers.

Weaving for Beginners - This weaving guide by Peggy Ostercamp is very comprehensive and includes many very clear illustrations. It is an excellent guide for those learning to weave and a wonderful reference to keep close to the loom.

Warp and Weave - This is an older book produced by Leclerc and included with almost every Leclerc loom. It is not as detailed as the above books but uses Leclerc looms and equipment to demonstrate the whole process with many tips.

There are quite a few other books available covering other areas of weaving and specific techniques. A full list can be found here. While not an instruction guide, Handweaver's Pattern Directory which contains hundreds of 4 shaft patterns is also very popular as a source for patterns for new weavers.


Leclerc Loom Catalog NEED HELP? Contact us for help in answering questions about these products
or for help recommending a loom matched to your weaving level and needs.

See our Leclerc Loom Comparison Chart for more help in deciding which loom is right for you.


How to Order:
Orders may be placed using our secure Online Order Form (this form should open in another window). Click Here for more information on how to place an order as well as our terms and conditions.

Payment/Currency:
Payment can be made using VISA or Mastercard, Cheque or Money Order in US or Canadian funds. US credit card purchases are billed directly in US funds eliminating any foreign currency conversion charges by the credit card company.

Product Directories
If you are looking for other items on our website, try using our product directories to quickly find what you are looking for! Our products are grouped as follows:

Knitting Product Index
Weaving/Spinning Product Index
Books, Magazines & Videos.
Price/Shipping Quote?
If you would like an exact quote for any items complete with shipping costs, please call or email us at nmanners@camillavalleyfarm.com with you location and we will provide this.

Gift Certificate
If you are looking for a gift for a Knitter or Weaver and can't figure out what they want, a Camilla Valley Farm Gift Certificate is an excellent way to ensure you get the perfect gift! We can also email gift certificates if you are running out of time!

Latest News/Updates
Keep up to date with what is new at Camilla Valley Farm by following us on Instagram! (Click on the logo below)

Camilla Valley Farm Instagram


Back To: Camilla Valley Farm Button


Last Updated: Tuesday January 9th, 2024