or for help recommending a loom matched to your weaving level and needs.
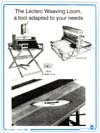
See our Leclerc Loom Comparison Chart for more help in deciding which loom is right for you.
This guide is for the newer brake design that uses a Turnbuckle.
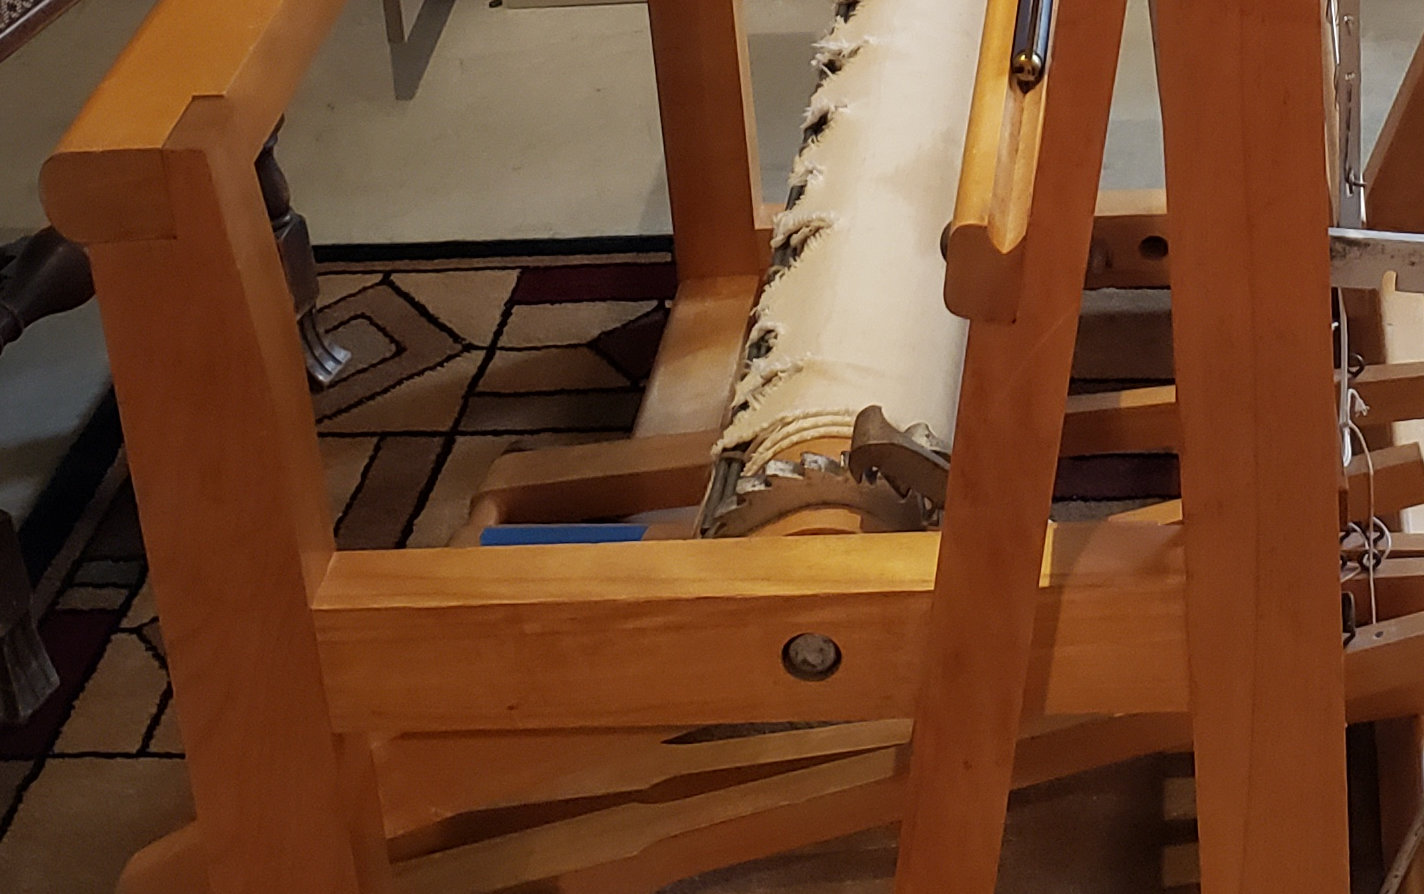
The Brake Circle can be easily replaced on a Leclerc floor loom by one person but having a second person makes the job easier. It is very important to not distort the shape of the brake circle while attaching it to the loom. Also, it is a good idea to take a few pictures of the existing brake configuration just in case you need to refer to them when installing the new brake circle. Make sure the folding Back Beam is fully extended as it would be positioned for weaving.
This process applies to most Fanny, Mira, Nilus, Nilus II, Nilart, Colonial and Weavebird models although the design of some very early models may prevent part of this disassembly.
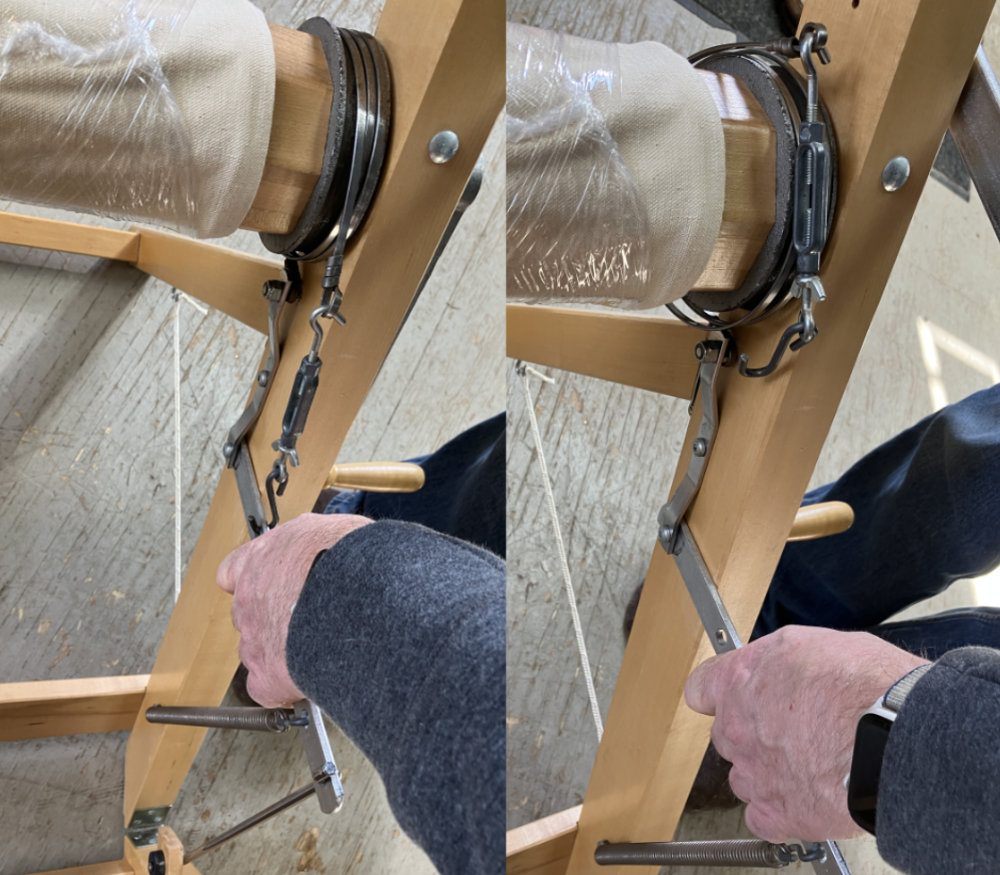
The metal Brake Circle wrapped around the Brake Drum on the end of the Warp Beam needs to be released from the pressure the spring is applying on it. On newer looms having a turnbuckle, one end of the turnbuckle can usually be disconnected by simply pulling up on the brake lever which stretches the Brake Spring. In some cases the turnbuckle body must be rotated first to lengthen it. On very new looms the turnbuckle will be permanently attached to the brake lever so the brake circle should be unhooked from the top end of the turnbuckle. Once the brake circle is unhooked it will expand making it easier to pull the beam out. Do not bend or distort the shape of the brake circle.
Disconnecting the Brake Circle will allow the Warp Beam to rotate unwinding the Apron and Warp rods. We suggest tying a string around the apron at both ends of the beam before releasing the brake or having another person hold the beam to keep it from rotating. On older looms with the smaller brake lever and brake cord, the spring must be held directly and pulled up, stretching it so the brake circle can be disconnected.
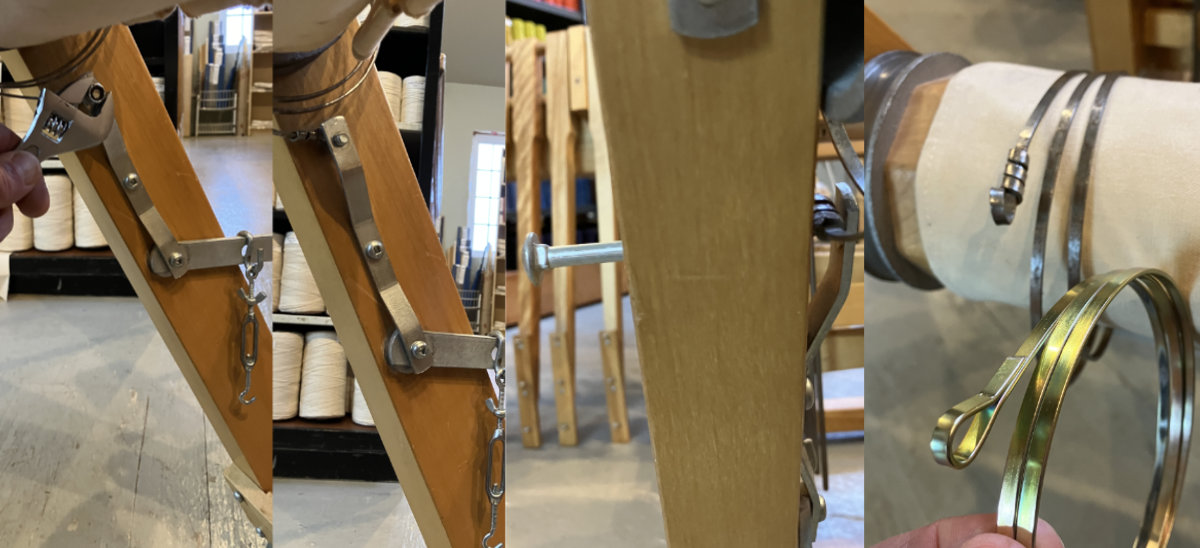
The other end of the Brake Circle is attached to the frame and doesn't move. It is held in place by a carriage bolt that goes through the frame into a Strengthening Piece. To remove the bolt enough to disconnect this end of the Brake Circle, using a wrench undo and remove the locknut and push the bolt towards the outside of the loom so it sticks out about 3/4 of an inch. Both ends of the old Brake Circle should now be disconnected. Compare the old brake circle position and direction of rotation with the new brake circle and adjust it if neccessary so that when replacing it in the next step, it rotates the same way.
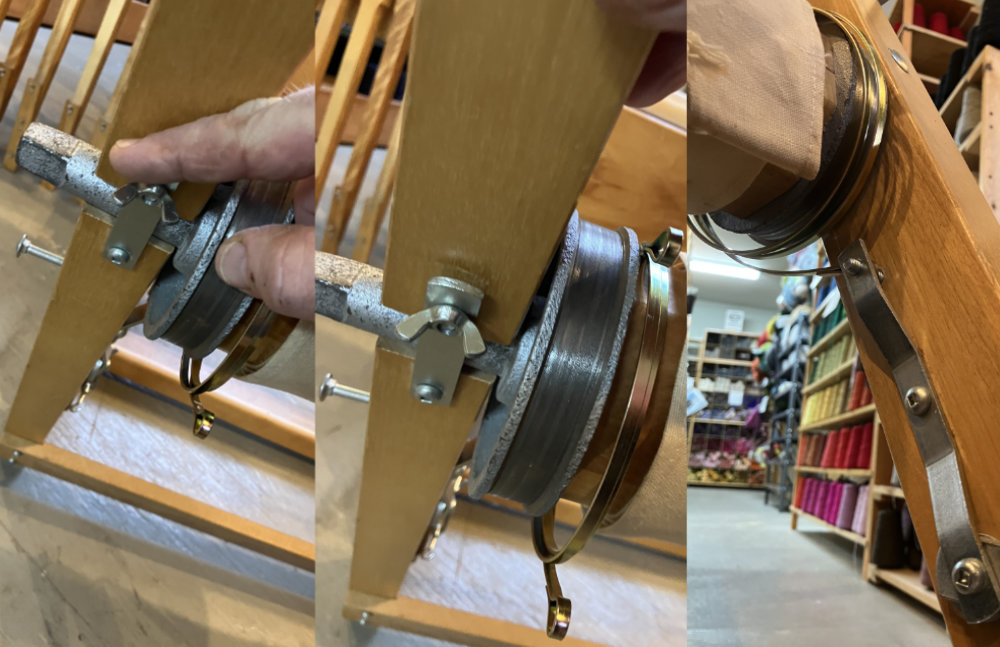
The ends of the Warp Beam fit in slots in the wooden loom frame and are held in place with metal latches on either side. By loosening the wingnut, the latch can be folded out of the way to remove the beam end.
BE VERY CAREFUL to support the warp beam when moving the latch as it is heavy and will fall if not supported. It is recommended that another person can help at this stage to make it easier. Undo the wingnut on the latch on the back right side of the loom (near the brake drum) to allow the latch to move out of the way. Once the latch has been flipped out of the way, the right end of the Warp Beam end can be removed out from the slot a few inches. This will allow you to remove the old brake circle from the right end of the warp beam and install the new brake circle.
Note that on very early versions of the F-Type (Fanny), M-Type (Mira) and Nilus looms, the cloth beam may go through holes in the frame instead of sitting in slots. On these looms, the Warp Beam cannot be removed without partially disassembling the frame.

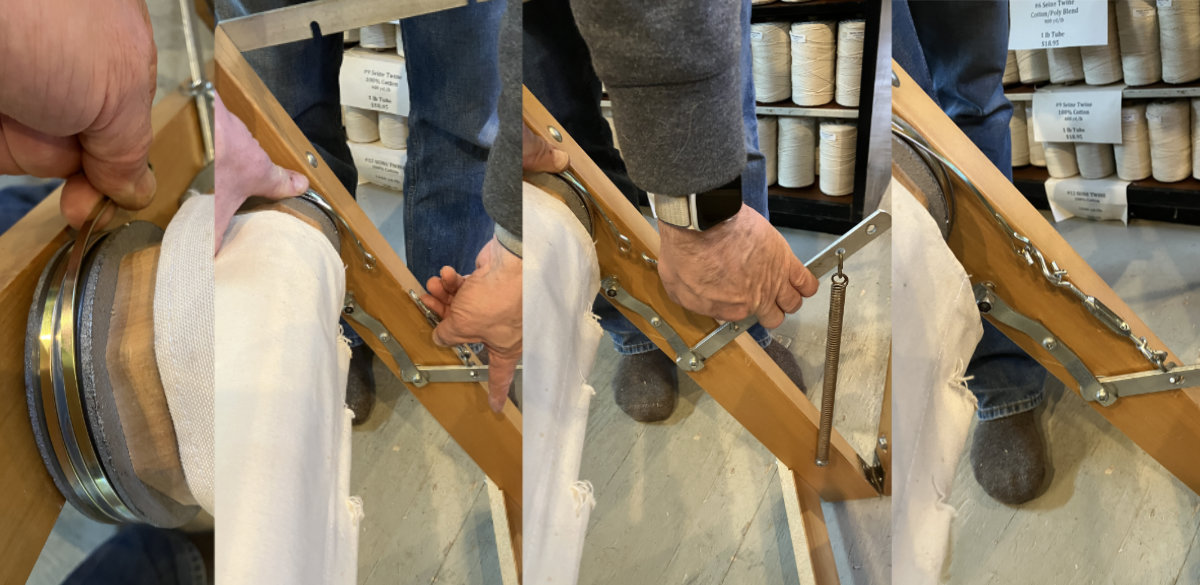
With the new Brake Circle on the Warp Beam, move the Right End of the Beam back in place and secure the latch tightening the wingnut to hold it in place. Position the Brake Circle around the Brake Drum with the end loop closest to the frame inside the Strengthening Piece. Push the Carriage bolt through it and the Strengthening Piece making sure the other end of the Carriage bolt fits in the square hole in the wood (rotate if the end is not aligned). Install and tighten the locknut on the end of the bolt so it is snug up to the strengthening piece but not preventing the end of the Brake Circle from moving slightly.
Adjust the Brake Circle around the Warp Beam Brake Drum so the turns are not overlapping and pull the end of the brake circle downward to reduce the Brake Circle diameter so it grips the Brake Drum. While holding one end of the Brake Circle and lifting the Brake Lever, hook the Turnbuckle into the Brake Circle so it connects it to the Brake Lever. This may be easier with the help of a second person on older looms where the Turnbuckle is not permanently attached to the Brake Lever. It also may be easier if the Turnbuckle is fully extended and an s-hook may be necessary to make the turnbuckle longer.
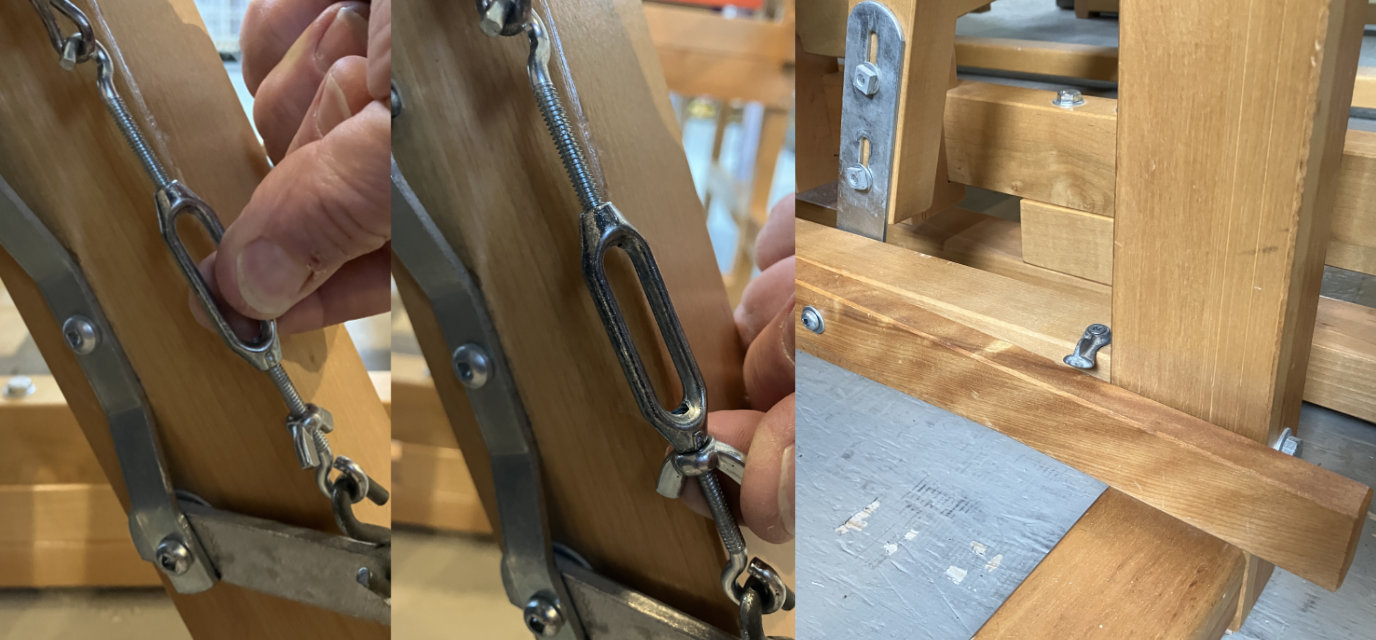
Once the Brake is reassembled, if it is not working properly, the Turnbuckle can be adjusted to set the brake to operate properly. As noted above, depending upon the loom, an s-hook may also be needed to extend the length of the Turnbuckle.
Rotating the body of the Turnbuckle lengthens or shortens it and it should be lengthened to begin the process. Before adjusting, make sure that the Brake Circle coils are not overlapping as they go around the Brake Drum. Then, locking the wooden Brake Treadle down at the front of the loom (Brake Off position), shorten the Brake Turnbuckle by rotating the body until the Warp Beam can no longer be easily rotated easily in a counter-clockwise direction (when standing on the right side of the loom facing it). Then, rotate the Turnbuckle in the opposite direction to lengthen it just until the beam can be rotated counterclockwise easily.
Once the brake is operating properly, tighten the wingnut on one end against the Turnbuckle body to lock it at that length. The goal is to have the Turnbuckle adjusted as short as possible as this will mean the end of the Brake Circle (and the Brake Treadle) will move the least amount between the "Brake On" and "Brake Off" settings which will prolong its life and prevent the brake circle from overlapping.
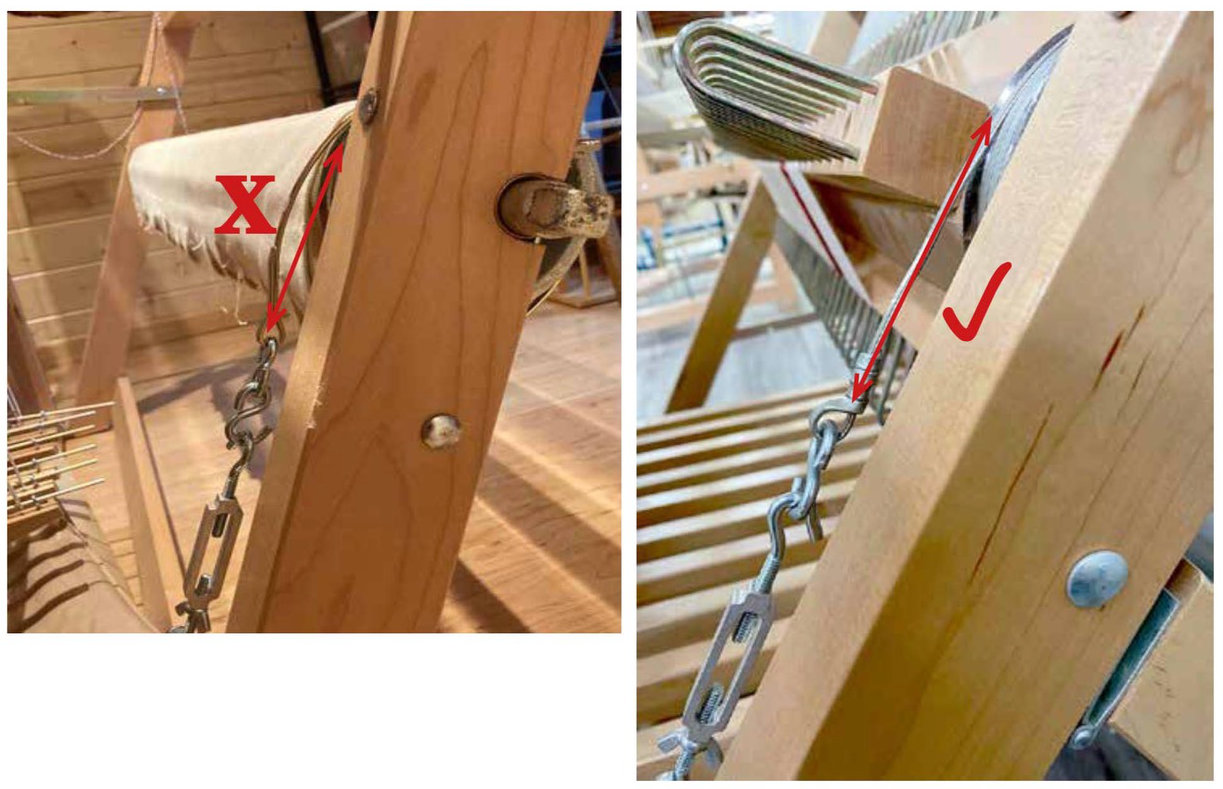
If there are problems with Step 6 and the Brake Circle can not be adjusted to release when the Brake Treadle is depressed, it may be that the shape of a part of the Brake Circle needs to be adjusted slightly. To maximize the amount the Brake Circle circumference around the drum expands when the Treadle is depressed, the short section of the Brake Circle between the Turnbuckle and the Brake Drum should be as straight as possible. This is done after making a mark on the Brake Circle near the Drum, disconnecting the Brake Circle from the Turnbuckle and then making the adjustment between the loop and the spot that was marked.
|
NEED HELP? Contact us for help in answering questions about these products or for help recommending a loom matched to your weaving level and needs. See our Leclerc Loom Comparison Chart for more help in deciding which loom is right for you. |
|
How to Order: Orders may be placed using our secure Online Order Form (this form should open in another window). Click Here for more information on how to place an order as well as our terms and conditions. Payment/Currency: Payment can be made using VISA or Mastercard, Cheque or Money Order in US or Canadian funds. US credit card purchases are billed directly in US funds eliminating any foreign currency conversion charges by the credit card company. Product Directories If you are looking for other items on our website, try using our product directories to quickly find what you are looking for! Our products are grouped as follows: Weaving/Spinning Product Index Books, Magazines & Videos. |
Price/Shipping Quote? If you would like an exact quote for any items complete with shipping costs, please call or email us at nmanners@camillavalleyfarm.com with you location and we will provide this. Gift Certificate If you are looking for a gift for a Knitter or Weaver and can't figure out what they want, a Camilla Valley Farm Gift Certificate is an excellent way to ensure you get the perfect gift! We can also email gift certificates if you are running out of time! Latest News/Updates Keep up to date with what is new at Camilla Valley Farm by following us on Instagram! (Click on the logo below)  |